
 |
| 3Ds MAX wineglass render |
Hello and welcome to another 3Ds MAX tutorial. In this tutorial we will learn how to model a 3D wineglass using a reference image from the internet (you can choose whatever photo you like to recreate the shape of the wineglass) and the Line Tool inside 3Ds MAX, then we will use the Lathe modifier to create the 3D geometry out of the 2D shape. You can use the Lathe modifier to create objects which are mostly objects created out of a 2D shape rotated over an axis, it's a strange subject to approach but I'm sure that after the tutorial you will know how to use it properly.
This is a step by step tutorial with images so I'll try to explain each step as well as I can but if you ever get stuck make sure to check the images under each step for a better understanding of what's going on. If you still get stuck and have any question about this tutorial make sure to post them into the comment section below the tutorial.
So first of all let's make sure that we got a reference image of a wineglass. For this tutorial I'm
using this one (but you can use any other as well) :
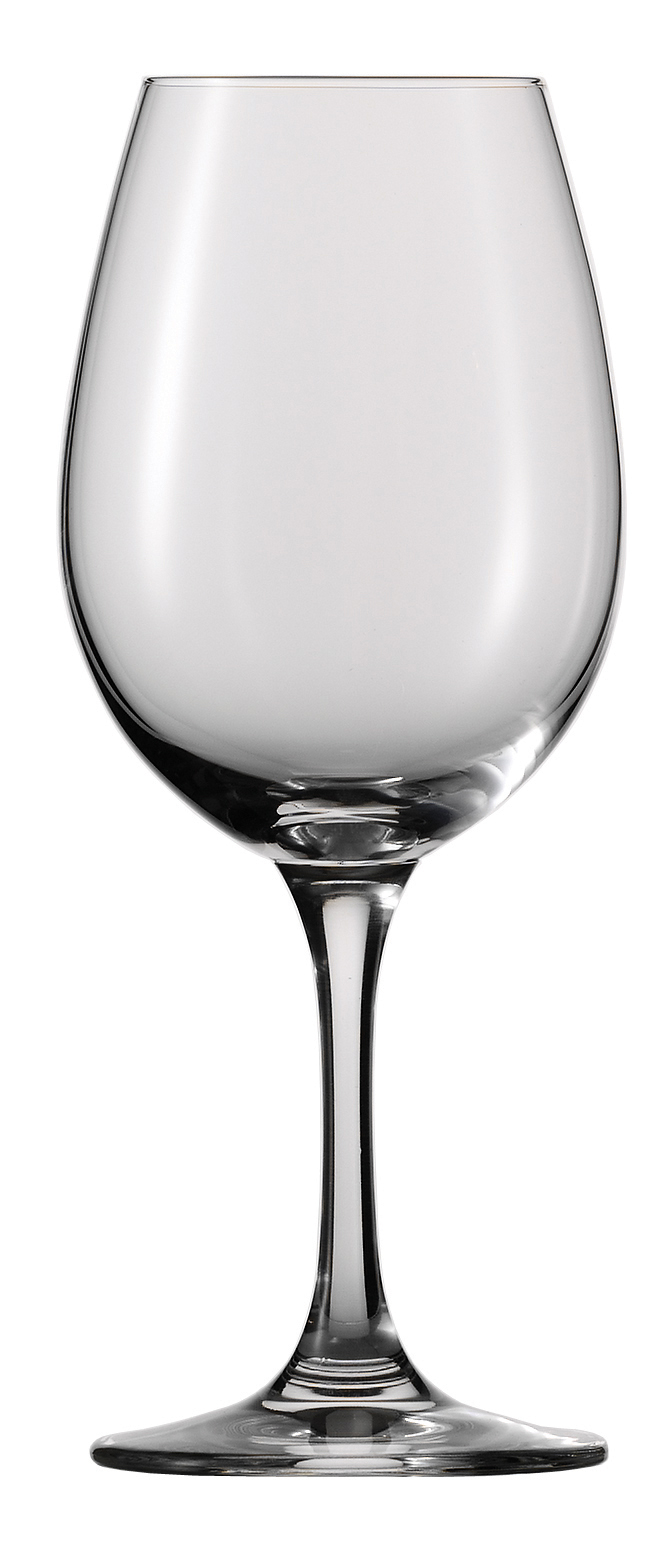
Open the image and save it onto your computer because we will need to import it in 3Ds MAX.
Step 1: Open 3Ds MAX and create a Plane into the Front View:

Step 2: Press F3 into the Front View to see the Shaded View of the Plane. Then go to the Modify tab
and change the following:
Length to 1546 (the actual height of our reference image)
Width to 667 (the width of our image)
Length Segments: 1
Width Segments: 1

Step 3: Press M to bring up the Material Editor. Then choose a Material Slot and press onto the Diffuse Box inside any Standard Material:

Step 4: A new window should pop-up having the types of materials that we can choose from. Choose Bitmap.

Step 5: Choose the Wineglass reference.jpg from your computer and hit OK:

Step 6: Hit Assign Material to Selection button inside the Material Editor (the 3rd button):

Step 7: Now press on Show Standard Map in Viewport to see the image texture onto our plane:

Step 8: Right click our plane in any Viewport and choose Object Properties from the list:

Step 9: From Object Properties disable Show Frozen in Gray then hit OK:

Step 10: Now right click the plane in any viewport and choose Freeze Selection so we don't acidentally move it later:

Step 11: Press Alt+W in the Front View to maximize the Viewport and choose the line tool from Create > Shapes:

NOTE!!! With right click on any vertex you can change its type to: Corner, Bezier Corner, Bezier or Smooth

Step 12: Now with the Line tool try to make the outline of the wineglass, something similar with the image below. Don't worry if you can't make the lines perfect from the start, you can go to the Modify Tab and modify them later by selecting vertices and moving points around.

Step 13: Make sure everything is in one Line, if you make multiple lines you will have to use the Attach button to add them to one single line and Weld the vertices later. Now select the Line and add a Lathe Modifier from the list:

Step 14: Inside Lathe Modifier you should end up with a screwed up shape that doesn't look like a glass at all. To fix that press on the Max button. If your model turns out black hit Flip Normals, if not leave it unchecked. Also change the Segments to 64 and make sure Weld Core is selected:

Step 15: Right click in the viewport and select Unfreeze All. Select the reference plane and right click it > Hide Selection to get rid of it in the viewports and render:

With a renderer like V-ray and some caustics and of course a glass material for our wineglass we can achieve results like these:

In the part II of this tutorial we will learn how to render the wineglass with V-ray.
For any questions about this tutorial use the comment section below.
See you next time!